Jasper Reports Tables and Parameters
By: Dan Stewart
August 30, 2016
I was asked to create a Jasper Report that has a parameter
that will be dynamically generated
from a database query.
This is how I passed that parameter to a table inside the report to get the results.
Prerequisites
First you need to have Jasper Server and TIBCO Jaspersoft Studio installed.
A data adapter needs to be connected to the database.
Step One – Create the Report
In Studio open the Project Explorer. We will create the report locally first, and then we will deploy it to the server.
Right-click on MyReports and add a new Jasper Report.

In the New Report Wizard, choose a blank template.
Give your report a name.
Choose a data adapter and enter a bogus query. I used
SELECT 'Hello' AS World
We need this so that the main report runs.
Click Finish.
You now see a blank report.
In the Palette, scroll down and add a table to the report.
The Table Wizard will be displayed.
Create the table using a new dataset.
Give your dataset a name and choose to create it from a connection.
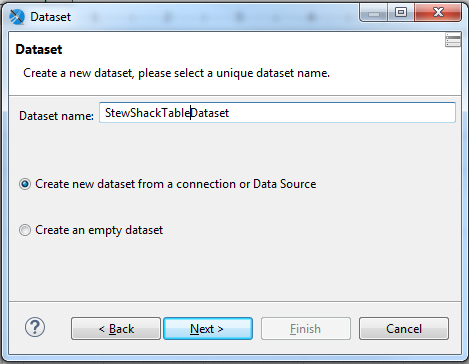
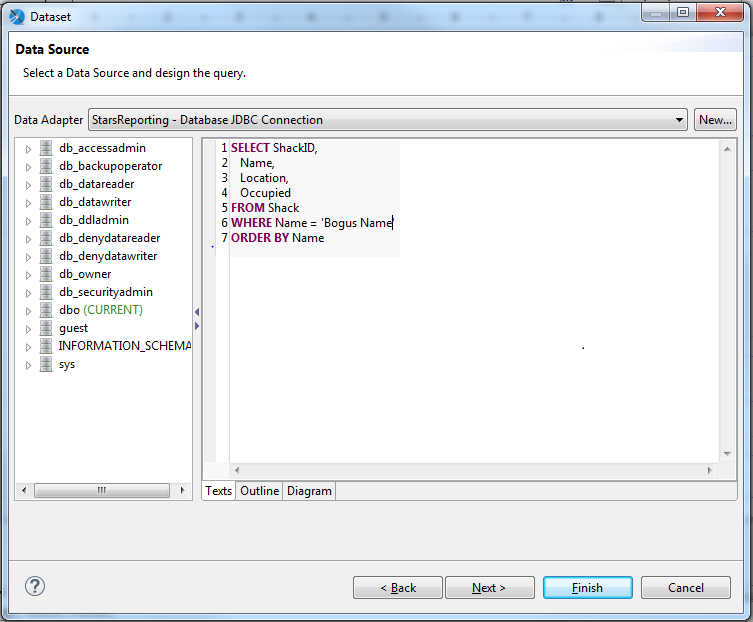
Choose the data adapter and enter the real query with a where clause that will return nothing.
We will update this later to use a parameter.
Move over your fields that you want in the report table.
Choose any fields that you want to group by.
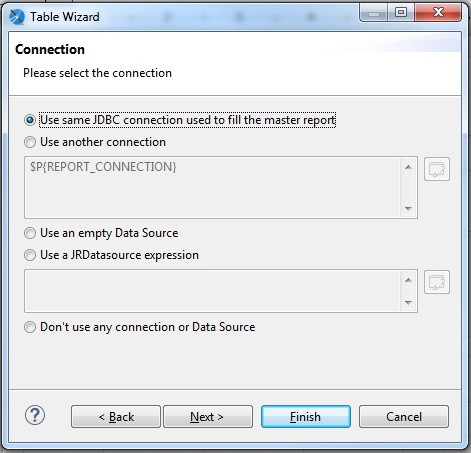
Use the same connection as the master report.
Choose the fields that you want to use as table headers.
Choose the table style.
Click Finish
You have added a table to the main report.
Adjust the table as needed inside the report.
If you preview the report, it should be blank.
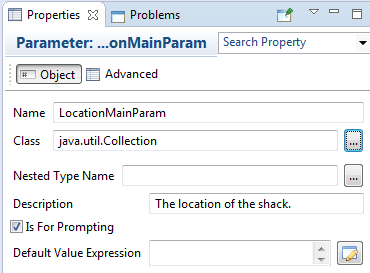
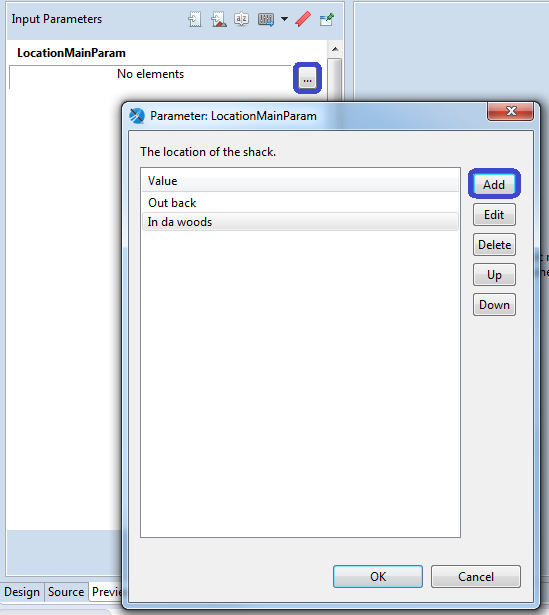
In the main report add a parameter.
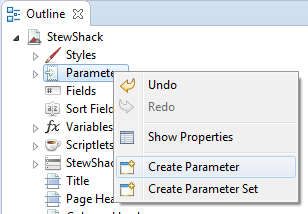
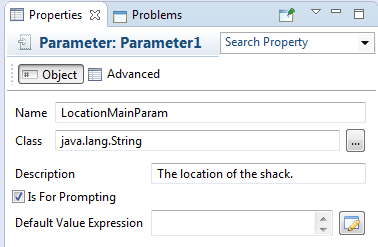
Give it a name that shows that it is in the main report.
I like to follow the convention of ColumnNameMainParam.
Leave it as a java.lang.String for now. We will update this later.
Provide a description.
Leave "Is For Prompting" checked as we will be asking the user for this parameter.
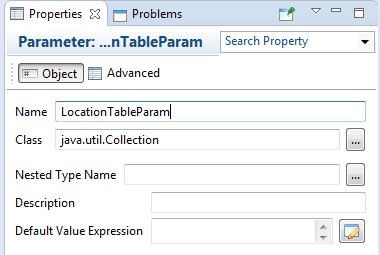
In your table dataset, add a parameter.
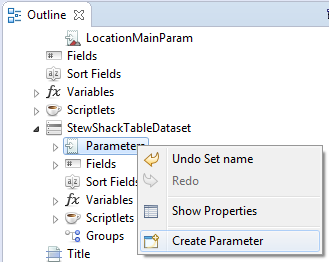
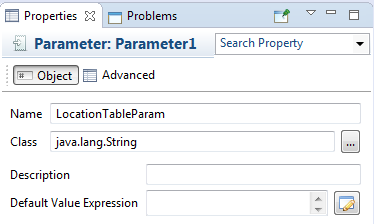
Give it a name that shows that it is in the table.
I like to follow the convention of ColumnNameTableParam.
You do not need to add a description.
Now we need to pass the value prompted from the main report to the table.
This connection is made in the properties of the table under the dataset tab.
Click Parameters.
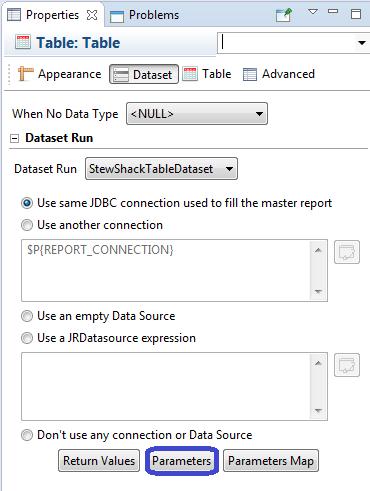
Add the relationship between the main report parameter and the table parameter.
You do this by clicking add, choosing the table parameter from the dropdown, editing the parameter expression, choosing the main report parameter.
Click Finish or Ok or whatever it takes to return to the report.
Here is a picture that is worth a thousand words.

Now that we linked a main parameter to the table, we need to use the parameter.
Edit the table dataset query.
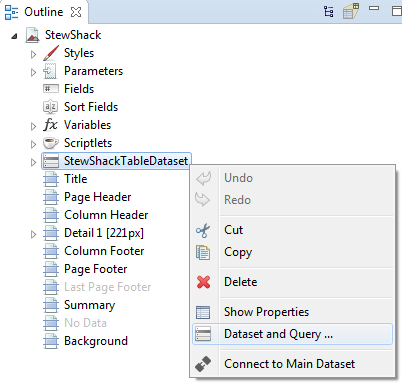
Add the table parameter to the query.
SELECT ShackID,
  Name,
  Location,
  Occupied
FROM Shack
WHERE Location = $P{LocationTableParam}
ORDER BY Name
Preview the report and make sure the parameter works.
You should now see data on the preview.
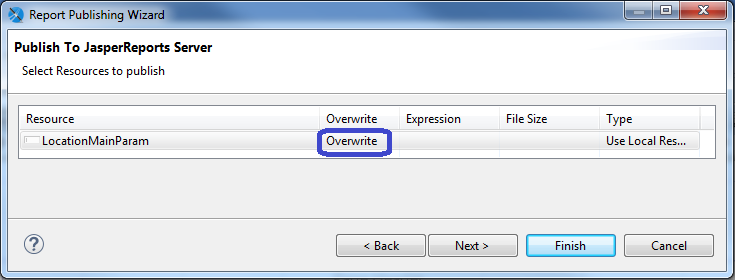
Step 2 – Publish the Report
Your server should be set up and Studio should have a connection to it.
Publish the report by going to the Project menu and choosing "Publish the file on JasperReports Server".
The Report Publishing Wizard will appear.
Go through the Wizard steps choosing a location on the server, publishing the report resources, choosing a datasource, and do not link a query.
Click Finish
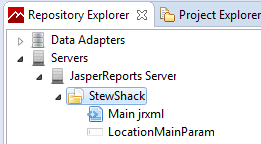
You should see your report in the Repository Explorer.
Step 3 – Convert the input control
If you expand the report, you will see the input control for the main report parameter.
We will convert this simple textbox control to a data driven dropdown.
This dropdown will only allow one choice. Later we will change this to allow for multiple choices.
You can double-click the control to show its properties.
From here you can make the dropdown mandatory and choose Single Select Query as the type.
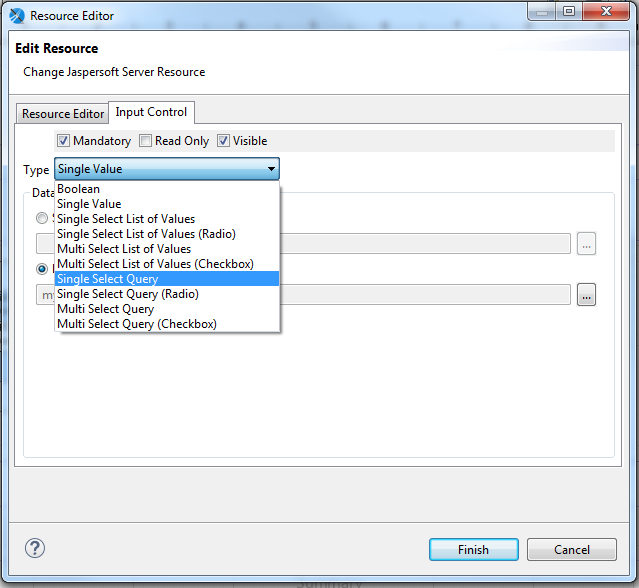
Click the … under Local Resource.
This will launch the Resource Editor dialog.
Choose a data source from the repository.
Enter the query that will populate the dropdown.
SELECT DISTINCT Location FROM Shack ORDER BY Location
Click Finish
On the Value & Visible Columns, add the value you want to use to pass into the report.
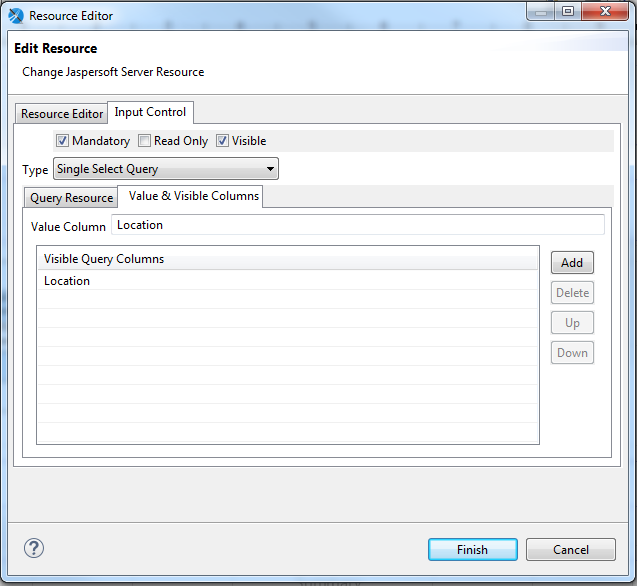
Click Finish
You have now changed the input control that will be used to pass in a parameter to the report.
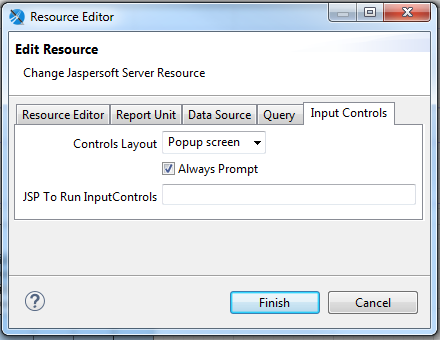
You can control how input controls work from the report properties input controls tab.
Run the report from the server to test it.
You should be prompted to enter a location. The values in the dropdown will be generated from the query you gave.
Optional – Allow for multiple values
The users of the report want to enter multiple values into the parameter.
Open the report from the project explorer. We will make our changes and publish the report when we are done.
We need to change the type of parameter we are using to a collection so that it can accept multiple values.
View the properties of the main report parameter and change it to be a java.util.Collection class.
Do the same for the table parameter.
Update the table dataset query to use an IN statement.
SELECT ShackID,
  Name,
  Location,
  Occupied
FROM Shack
WHERE $X{IN, Location, LocationTableParam}
ORDER BY Name
Previewing the report allows you to enter multiple values.
Publish the report.
Be sure to overwrite the parameter.
Open the properties of the parameter through the repository explorer.
We will change this to the Multi Select Query checkbox.
Then we will enter in the data source and query as we did when it was a single select.
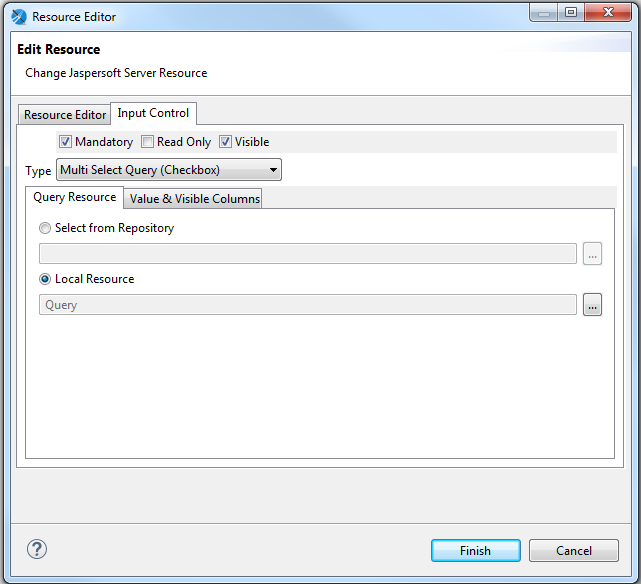
Click finish and view the report on the server.
You should now see a multi select checkbox control that is built from values in the database.
Lessons Learned
If you change and save your report through project explorer, a dialog will appear asking if you want to publish it.
Click No and never ask me again.
If you click yes, the input control you worked so hard on will be overwritten.
It is best to publish the report through the project menu and choose if you want to overwrite the parameter or not.
Save your queries that were used to generate the report parameters in case you have to rebuild them.
If your parameter is a date and you want it to be all inclusive, modify the SQL with this:
DATEADD(DAY, DATEDIFF(DAY, 0, $P{StartDateTableParam}), 0)
DATEADD(DAY, 1, DATEADD(DAY, DATEDIFF(DAY, 0, $P{EndDateTableParam}), 0))